Pages

TaggersDelightDesigners

TaggersDelightDesigners
TaggersDelight

Devilish Designs

Devilish Designs
Devilish Designs

Creationzbysharon

Creationzbysharon
I am writing tuts for her scrapkits

The Creative Chicks

The Creative Chicks
The Creative Chicks Forum

Tuesday, August 14, 2012

Hot chocolate 

tut by ann smith 
scrap kit ptu by brokenskydezine her web addy  http://brokenskydezine.blogspot.com
I purchased her scrap kit here taggers delight
Tube by Rion Vernon -PinUpToons -www.pinuptoons.com
You can purchase his art here at CDO


Hot chocolate
Supplies used
brokenskydezine scrap kit (PTU)
mask of your choice
font of your choice Im using Island of misfit toys 
size 48 blue and black
My word art attached png dormat
tube by Pin Up Toons (PTU)


Hot Chocolate


open 500 x 500 

open your paper BSD 11
copy and paste as  a new layer
open your mask your using I'm using one by WSLmask148
merge group 

click on raster 1 flood fill with white go back to mask layer

open element bsd 7
copy paste as a new layer on your mask 
image re size by 19 percent 
place it on the right corner of your mask like mine 
use this drop shadow
V-2
H-1
O-45
blur- 5.00
black

open  element BSD11
copy paste as a new layer on your mask
image re size by 43  percent
place it on the right corner of your mask like mine
use this drop shadow
V-2
H-1
O-45
blur- 5.00
black
place to the left side


open  element BSD9

copy paste as a new layer on your mask
image re size by 19  percent
place it on the right corner of your mask like mine
use this drop shadow
V-2
H-1
O-45
blur- 5.00
black
place by the mug like mine
layers duplicate
image mirror
move them around tell u like the way they sit
something like mine

open the word art i provided copy paste it

use this drop shadow
V-2
H-1
O-45
blur- 5.00
black
place where u want it on your tag

open your tube u are using
mines by Rion Vernon Pin Up Toons
copy paste your tube
re size to your liking

use this drop shadow
V-2
H-1
O-45
blur- 5.00
black
place where it looks good

place your copyright info license number and water mark

add the name u want on it
use any font u want size u want
I used this font Island of misfit toys

use this drop shadow
V-2
H-1
O-45
blur- 5.00
black
place where u want it
your done unless u want to animate it like mine

to animate

click on your mug using your magic wand
using  these settings


replace
rbg value
T-30
sample and cont ticked
F-0
anti un ticked
ok u should have marching ants on tour cream
go to adjust add noise
with these settings
gaussian
noise 18
mono ticked
hit ok select none
edit copy merged
in animation shop paste as a new animation

go back to paint shop
undo select none undo noise
go to noise
do the same as above change noise to 25


edit copy merged
in animation shop paste as after current frame

go back to paint shop
undo select none undo noise
go to noise
do the same as above change noise to 35


edit copy merged
in animation shop paste as after current frame

now your done
save your done hope u liked my tut
plz do not re write it
©ann smith


Thursday, July 26, 2012


Ocean Adventures
Tut by Ann Smith
Im using a PTU kit by ©brokenskydezine  her website  http://brokenskydezine.blogspot.com
U can get the kit  here at Taggers Delight 
I'm Using a PTU Artist ©Rion Vernon-Pin Up Toons mine is from CILM but u can buy his art at CDO now
his web site is www.pinuptoons.com
The Font I'm using is WishFul waves size 48


open a 600 x 600 new Canvas 
open up the frame from the kit raster1
copy and paste as a new layer
re size 91 percent
add this drop shadow 
V-3
H-3
O-50
Blue-5.00
Color Black

open the background  BSD1
using your magic wand with theses settings below 
replace
RGB Value
T-43
both ticked sample and contiguous
F-0
click on the middle of the frame u should have marching ants 
copy and paste as a new layer 
Image Re Size 36 percent 
selections Invert then hit delete on your key board
selections modify expand by 4
then  select none

then take your sparkle raster 1 right next to the background in the kit 
copy and paste as a new layer 
re size by 67 percent 
move it where u like it somewhere on the frame

now open your turtle BSD 43
re size him by 20 percent
Click on raster 3 so u are on the background 
place him to the right of the back ground

add this drop shadow
V-3
H-3
O-50
Blue-5.00
Color Black

open BSD 52
copy and paste
Re size by 10 percent
 move below the turtle


add this drop shadow
V-3
H-3
O-50
Blue-5.00
Color Black

open BSD 31
copy and paste as a new layer
re size by 33 percent
place him to the right on the outside of the frame


add this drop shadow
V-3
H-3
O-50
Blue-5.00
Color Black

open BSD 9 the sing ray
copy and paste as a new layer
image re size by  20 percent place
 him to the bottom left in the frame


add this drop shadow
V-3
H-3
O-50
Blue-5.00
Color Black

Open BSD 8 the Jelly fish
copy paste as a new layer
re size by 20 percent
move him right above the frame raster 3
make sure his tentacles are right below the sting ray like mine


add this drop shadow
V-3
H-3
O-50
Blue-5.00
Color Black

click back up to the top on raster 8

place your tube u are using to the left of the frame
re size to your liking
I'm using CILM Rion Vernon Mermaid

I re sized mine 81 percent


add this drop shadow
V-3
H-3
O-50
Blue-5.00
Color Black


open BSD 26 the map
click below your frame

copy and paste your map


add this drop shadow
V-3
H-3
O-50
Blue-5.00
Color Black

now it should be raster 11

raster1 should be under it if not
just add a new raster layer and drop below  the map

open BSD 2 copy and paste as a new layer

now go back up to the top
 click on raster 10
now we will add the copyright info of your tube license number if needed and your water mark tag by so  and so

then add your name on your tag

then u are done
save as a PNG

tks for trying out my tutorial plz do not re write it
Tutorial © Ann Smith
written on July 26 2012


Tut by Ann Smith 
Im using a PTU kit by ©brokenskydezine  her website  http://brokenskydezine.blogspot.com
U can get the kit  here at Taggers Delight 
I'm Using a PTU Artist ©Rion Vernon-Pin Up Toons mine is from CILM but u can buy his art at CDO now
his web site is www.pinuptoons.com
The Font I'm using is WishFul waves size 48


Sunday, July 22, 2012

Super Natural

SuperNatural
Tut By Ann Smith
Written on July 22 2012
so not re write or copy or claim as your own
A PTU kit By Mellow Graphics
Get this kit at Taggers Delight

Artist Im using is ©Michael Calandra - www.calandrastudio.com
You can get his art at PTE


Super Natural

Open a blank Canvas 500 x550
open paper 5 from the kit copy and paste as a new layer
image re size 70 percent

open the dirt mound 2 

re size 51 percent
use this drop shadow
H-1
V-1
O-14
blue 5.00
color black


open element 3 tombstone copy and paste as a new layer place it on your canvas where u want it
re size 70 percent
use this drop shadow
H-1
V-1
O-14
blue 5.00
color black

open skull 1 from the kit 
copy paste a new  layer


re size 70 percent
re size  70 percent
re size  70 percent
(do it 3 times like above)
use this drop shadow
H-1
V-1
O-14
blue 5.00
color black
place near 3 tombstone 

open the tree from the kit 

re size  70 percent

H-1
V-1
O-14
blue 5.00
color black


place to the right 

open tombstone 1  from the kit
re size  70 percent

H-1
V-1
O-14
blue 5.00
color black

open the zombie from the kit


re size  70 percent

H-1
V-1
O-14
blue 5.00
color black
pace near the tombstones


open the moon from the kit 

re size  34 percent

H-1
V-1
O-14
blue 5.00
color black
place to the top right corner like mine

open spell book 2 from the kit 

re size 51 percent
use this drop shadow
H-1
V-1
O-14
blue 5.00
color black
place it where u want it 

open Impala 2 from the kit 

open spell book 2 from the kit 

re size 86  percent
use this drop shadow
H-1
V-1
O-14
blue 5.00
color black


re arrange it so it looks good 

open the lap top from the kit 

re size 46  percent
use this drop shadow
H-1
V-1
O-14
blue 5.00
color black
place it where u want to or where mine is
adjust sharpen 

open holy water one 

re size 27  percent
use this drop shadow
H-1
V-1
O-14
blue 5.00
color black
place next to lap top

open the gas can from the kit

re size 27  percent
use this drop shadow
H-1
V-1
O-14
blue 5.00
color black
place next to the holy water

open the raven from the kit 

re size 27  percent
use this drop shadow
H-1
V-1
O-14
blue 5.00
color black
place him on  the car hood


add your artist tube u are using place where u like
use this drop shadow
H-1
V-1
O-14
blue 5.00
color black
re size how ever it looks good in your tag
I paced my tube behind the car
remember artist copyright license number if needed and your water mark
font I used was  Flat Pack
Have Fun Make it your own =)
ty for doing my tut
Tut by Ann Smith
do not claim as your own or re write it like mine


Monday, June 25, 2012

Spring Fling

A tutorial by Ann Smith

A PTU kit by Babycakesscraps
http://babycakesscraps.blogspot.com/
get the kit here Taggers Delight
tube Im using by ©Blossomppg -http://blossomppg.deviantart.com
font I used Automobile


Spring Fling

open 500 x 500

Flood fill with #40ffff 
copy and past cloud 2 from the kit
re size by 81 percent
use this drop shadow
V-2
H-2 
O-43
blur- 5.00
color black 

copy and paste balloon
re size by 35 percent
place it over the cloud


use this drop shadow
V-2
H-2 
O-43
blur- 5.00
color black 


copy and paste bsc tree with apples 
re size by 35 percent
move this layer bellow balloon 


use this drop shadow
V-2
H-2 
O-43
blur- 5.00
color black 


copy paste fence 

re size by 59 percent

use this drop shadow
V-2
H-2 
O-43
blur- 5.00
color black 


layers duplicate move it so it fits with the other piece

copy and paste tall house from the kit 
re size by 43 percent 
move layer  bellow the fence layers 

use this drop shadow
V-2
H-2 
O-43
blur- 5.00
color black 


now copy and paste green bloom place in front of fence
re size by 43 percent 

use this drop shadow
V-2
H-2 
O-43
blur- 5.00
color black 

duplicate layer move next to each other


go back to balloon layer re size again 
re size 43 percent

now copy paste the snail

re size by 17  percent 

use this drop shadow
V-2
H-2 
O-43
blur- 5.00
color black 
place him on the fence

add your tube where u want it
copyright info and your watermark

add the name you want on it =)

now  your done 

tut ©ann smith do not re write it 


Saturday, June 23, 2012


Gothic Wonderland

This  tut was written by Ann Smith on June 23 2012
the kit I'm is a PTU Kit by
Monti her website is here
http://www.montispixelplayground.com 
You can get her kit here at Taggers Delight 
I'm using the art by Suzanne Woolcott U can get her art here http://www.gorjussarthome.com/store/
Font I'm using Automobile

Gothic Wonderland

Open a new 500 x 500 Canvas
Edit copy and paste the storybook from the kit
image re size 66 percent
add a drop shadow
V-2
H-2
O-43
Blur 5.00

we will be using element path
copy and paste as a new layer
make sure it looks like its comming out of the book

add a drop shadow
V-2
H-2
O-43
Blur 5.00


edit copy and paste the toadstool from the kit
re size by 48 percent

add a drop shadow
V-2
H-2
O-43
Blur 5.00


edit copy and paste the caterpillar from the kit
re size by 48 percent
be sure place hi\m in front of the toadstool

add a drop shadow
V-2
H-2
O-43
Blur 5.00


edit copy and paste the this way sign from the kit
re size by 36  percent
be sure place it by the book

add a drop shadow
V-2
H-2
O-43
Blur 5.00


edit copy and paste the that  way sign from the kit
re size by 36  percent
be sure place it by the book

add a drop shadow
V-2
H-2
O-43
Blur 5.00


edit copy and paste the that  pink eat me  from the kit
re size by 36  percent
place by the path

add a drop shadow
V-2
H-2
O-43
Blur 5.00


edit copy and paste the   drink  me  from the kit
re size by 47   percent
place by the path

add a drop shadow
V-2
H-2
O-43
Blur 5.00


edit copy and paste the cheshire cat smile  from the kit
place  where you want it

add a drop shadow
V-2
H-2
O-43
Blur 5.00


edit copy and paste the  key silver white  from the kit
re size by 59   percent
place  in the center of the book like mine

add a drop shadow
V-2
H-2
O-43
Blur 5.00


now we will use the tube u are using
Im using Susanne Woolcott (mine has a AIM license number
 U will need to purchase her from her tube site
 and get a license number from her if using her art!)

add tube of your choice

re size by  81   percent
place  on the path

add a drop shadow
V-2
H-2
O-43
Blur 5.00


add  a rabbit with clock Monti has some to choose from Mine came from SW Tube

re size by  81   percent
place  in front of your tube or where ever it looks good

add a drop shadow
V-2
H-2
O-43
Blur 5.00

add your name
and copyright info license number (if u need one )
your water mark

Your done


ty for trying my tut I hope u enjoyed it =)
remember do not copy my tut by re writing it


Thursday, May 31, 2012


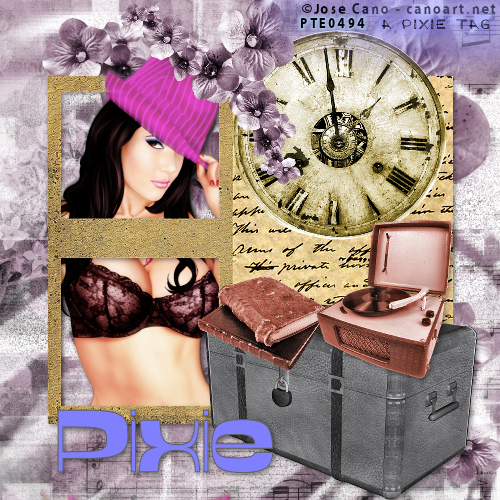
Aged To Perfection

Tut By Ann Smith
Kit PTU by Tonya ~AKA~ Broken Sky Dezine
U can visit her site here http://brokenskydezine.blogspot.com
U can purchase the kit here at Taggers Delight http://taggersdelight.com/store/
artist I'm using is  ©Jose Cano - canoart.net  get his art here at PTE  
My Supplies
animated smoke supplied 
scrap kit I'm using  u must purchase from above
artist I'm using purchase above
Font  I'm using is  Citrus 
smoke rapid share download
smoke 4 shared download

Non Animated

animated


Aged To Perfection

Open a new raster 500 x 500
copy and paste paper 5 from the kit
open a mask of your choice I'm using a grunge mask 
smggrungemask3

apply it then merge group 
on your raster 1 add white
go back to your top layer
open element 20
copy paste as a new layer 
image re size 81 percent
add this drop shadow
V-2
H-2
O-40
Blur-7.00
color- black

hide your bottom layers by x out the eye

under your frame layer 
copy and paste your artist of your choice place it where it looks good in side it 
now take your eraser tool erase abound your frame erase all excess tube away
then use this drop shadow
V-2
H-2
O-40
Blur-7.00
color- black
then duplicate your tube
on the original tube add this drop shadow
V-2
H-2
O-40
Blur-7.00
color- black
on duplicate layer 
adjust
Motion blur
with these settings
S-1100
change blend mode on this layer
Soft light
layers merge down

now we will use the following elements
BSD13
BSD39
BSD2
BSD3
BSD40
click under your original tube layer 
we will add the purple flowers place it right above the mask layer 
re arrange it to your liking 
add this drop shadow
V-2
H-2
O-40
Blur-7.00
color- black
click back up to the top above the frame layer
paste as a new layer the clock 
image re size 43 percent
place where u want it
use this drop shadow
V-2
H-2
O-40
Blur-7.00
color- black

now copy and paste your trunk element
image re size 59  percent
place where u want it
use this drop shadow
V-2
H-2
O-40
Blur-7.00
color -black

now add the books to the left side set it on the trunk
image re size 40 percent 
use this drop shadow
V-2
H-2
O-40
Blur-7.00
color -black 

now add the record player
place it on the trunk 
image re size 59 times 2 (twice)
use this drop shadow
V-2
H-2
O-40
Blur-7.00
color -black

we will add the purple flowers  again to the right corner of the frame 
re size by 39 percent
re arrange it to your liking 
add this drop shadow
V-2
H-2
O-40
Blur-7.00
color- black

add your copyright info - license number- your water mark
add the name u want

your done 

if u want to animate it then follow this

Animate

move it from paint shop to animation shop
edit copy merged

go to animation shop 
edit paste as a new animation
duplicate your tube  so u have 5 frames
to do this 
edit duplicate selected repeat this tell u have 5 frames
open your smoke i provided
it has 5 layers already 
on your smoke layer go to edit select all copy
now go to your tag edit  select all paste into selected frame place it where u want 
I placed mine over the record player

U are done ty for trying my tut 
plz do not reproduce the tut or re write it where its like mine
This tut was written by ann smith on 5/31/2012


Sunday, May 27, 2012


Tut By Ann Smith
Kit PTU by Tonya ~AKA~ Broken Sky Dezine
U can visit her site here http://brokenskydezine.blogspot.com
U can purchase the kit here at Taggers Delight.


Im using a free to use artist by ©Popeye Wong   www.popeyewong.com
font All over again
word art by me I'm not broken 


I'm Not Broken

open 500 by 500 canvis

use a mask of your choice
copy and paste paper 5 from the kit
now use your mask of your choice
Im using DBM Mask 307
go to layers load mask of your choice 
click on your mask layer merge group
click on raster 1 flood fill with white

now we will copy and paste frame BSD 27
move layer above your mask resize by 75

x everything out but your frames 

use your magic wand click on the black part of the frame of each frame 
 be sure hold your shift key down 
while u do this 
we are changing its color of each frame 
pick a color from your tube flood fill the black part with your color
select none
add this drop shadow
V=2
H=2
O=40
B-7.00
color Black

use your magic wand click on thne first frame add a piece of your tube
go to selections invert  hir delete on your key board
add same drop shadow  as above select none 
do the same for the other two frames slots

x everything out but your frames 

click above your frame we will use the magic wand again click on each frame piece
choose a color from your tube flood fill with it

take bsd1 your broken heat resize by 46

place in the middle of your frame use same drop shadow as above

take element bsd 7 your keys 
copy and paste as a new layer
re size by 46
image free rotate to the right 90 degrese
erase a little off to where it looks like its hanging 
use the same drop shadow as above

add your tube resize to your liking 
image mirrior
same drop shadow as above

noe copy and paste the word art I provided  place top of your tube 
same dropshadow
now add your artist copyright 
and the name u want on the tag we are done
save as a png

ty for trying my tut